Tag Archives: alignment

The Importance of Meditation to Yoga Practice

Meditation (known as Dhyana in Sanskrit) was part of ancient yoga and remains one of the most essential features of yoga practice. Meditation is basically the most direct way to connect to supreme or essential “Self” (Atman) through developing deeper consciousness. And in addition to its spiritual significance, meditation and yoga are practiced together to establish and maintain optimal health and wellness.

In these modern times the practice of yoga training has become more estranged from meditation than in the past, with the primary focus often being on asana (poses), but nonetheless meditation still remains crucial to even the most fundamental understanding of the science of yoga. With the widespread attraction to yoga from today’s contemporary students, the question frequently arises as to whether meditation is really necessary to appreciate the full scope of what yoga practice has to offer.

This question will easily be answered once the student realizes that yoga and meditation are bound together as intimately as breathing and air. It is futile to attempt to practice one without the other. The very question of whether meditation is necessary to perform yoga properly indicates a general lack of understanding in regard to both subjects.

Yoga is meditation. It doesn’t really matter whether it’s fast or slow, hot or cold; all forms of yoga practice rely on the basic principles of meditation to occur. Yoga practice is a form of exercise as well, but it is exercise at its most highly evolved level, meaning yogic exercise is, in itself, a form of meditation.

Meditation brings consciousness to every action taken. In order to correctly perform yoga asana the mind needs to be active along with the body. This consciousness in action takes the form of counting breaths, holding poses, correcting alignment and smoothly sequencing from one position to the next. This activity takes place in accordance with a deliberate “mindfulness” that is the true essence of every yogic session.

Meditation recognizes that the mind is supervising this physical activity, but there is much more that the mind can be occupied with. The addition of Mantras, Mudras, introspective thoughts and even visualization will more fully occupy the mind so that the energies expended by the body are all working toward a single constructive purpose, to bring complete mindfulness and total awareness into every action.

Once these concepts are fully grasped it it becomes apparent that for people who chose to practice asana, meditation is absolutely required. Meditation cannot be some abstract idea that is separate from the whole of yogic science; meditation in fact, is the beginning and end of all yogic methods and techniques.

If you are among those who are confused (or even disturbed) by the concept of meditation, it may be helpful to think of it in a more straightforward manner. So consider this; meditation can be looked upon as a means of encouraging and hastening the attainment of the state of enlightenment through mental concentration, clarity of mind and self improvement.

Additionally, meditation is something that returns us to being in the present moment. It is a deep connection, through a heightened awareness of oneself, in relationship with the things and people all around. Meditation and yoga combined are known to be helpful in recovering from breathing problems, boosting the immune system, reducing cholesterol levels and increasing energy and stamina, resulting in an improvement of overall health and an enhanced sense of connection to the Divine Spirit within.

Meditation Proven to Decrease Stress and Reduce Inflammation

UCLA’s Department of Psychiatry and Bio-behavioral Sciences conducted a recent study that demonstrated once again that even relatively short meditations, when practiced consistently, have numerous significant and positive effects on both the body and the mind. This particular study evaluated 49 caregivers who were tending to patients with Alzheimer’s and various other forms of dementia. Nearly 50% of the caregivers in this study experience clinical depression, plus they are also twice as likely as the general population to report elevated levels of stress.

This research study divided the caregivers (ranging in ages from 45 to 91) into two groups: one that practiced a 12-minute meditation daily for 8 weeks, and one that spent 12 minutes each day for 8 weeks relaxing while listening to a musical relaxation CD.

The meditation group showed several benefits over the group that listened to the music:

• Significantly lower levels of depressive symptoms

• Improvements in reported mental health

• Improvements in cognitive functioning

• Increased telomerase activity in the blood (an indication of decreased cellular aging)

• Significant decreases in blood proteins associated with inflammation.

Think about it, all of these benefits from only 12 minutes of meditation a day!

This specific study examined a chanting meditation practice called Kirtan Kriya, but many other, prior studies on meditation have shown similar body-mind benefits, even with a variety of meditations. In short, most any meditation practice you do for at least 10 minutes or more daily is likely to achieve similar results to these.

The meditation that follows (Simple Counting) has been used in various other studies related to meditation’s “relaxation response.” But remember, the most effective meditation practice is one you feel comfortable with and will actually practice. Hundreds (perhaps thousands) of meditation techniques exist and are easily found on the web. Experiment and find the one that is best fit for you.

A Simple Counting Meditation:

• Sit comfortably, with your spine erect and imagine the crown of your head floating up
to the ceiling.

• Allow your eyes to close, and notice your breath – without intentionally trying to
change it. Bring your attention to the warmth and coolness of the breath
at the tip of your nostrils.

• After 2 to 3 minutes (or whenever you feel you are ready) start counting each exhalation.
For example, when you exhale the first time, mentally count “one.” The next time you exhale, count “two.” Keep counting silently to yourself, until you get to ten. After you reach ten, then start over again from “one.”

• You’ll know when your mind has wandered because you’ll lose count or notice that you’re thinking about something else. When that happens, (and it will!) do your best not to get frustrated. Instead, simply start over again by counting from “one.” Without judgment or criticism, notice how often you need to restart counting. The goal isn’t necessarily to get to 10, but to keep refocusing whenever you catch your mind wandering.

• Continue this meditation for at least 10 minutes, the longer the better depending on your time restraints.

Keep in mind that there’s no need to worry about “being good” at mediation; just by the act of meditating you are inherently good at it no matter how often your mind wanders as long as you keep bringing it back.

Core Strength and Its Importance

If you’ve ever practiced yoga, Pilates or worked with a personal trainer you’ve most likely heard about the importance of engaging or strengthening “the core.” And have you noticed how as soon as you tighten or “firm up” your belly, your posture changes in a positive way? That’s just one example of the power of “core strength!”

The Core Muscles – where they’re located & what they do…

Core strength is totally dependent on the core muscles but what exactly are they? The list of muscles that make up the “core” is somewhat arbitrary and different experts include different muscles and muscle groups. A common consensus is there are 29 pairs of muscles that make up the core. But, rather than go into detail about all 29 pairs let’s just say that the core muscles run the length of the torso and spine; they work together to strengthen and stabilize the pelvis, spine and shoulders, maintaining a solid foundation while transferring energy from the center of the body out through limbs.

Some of the most common core muscles that accomplish this task are:

Rectus Abdominis (the “Abs”) – Located along the front of the abdomen, this is the most well-known abdominal muscle and is often referred to as a “six-pack” due to its appearance in individuals with a well developed musculature. It acts to flex the vertebral column (particularly the lumbar portion), it tenses the anterior abdominal wall assisting in compressing the abdominal contents.

Erector Spinae- This group of three muscles runs along your neck to your lower back. It functions to straighten the back and to rotate it to one side or the other.

Multifidus – Located under the erector spinae along the vertebral column, one of the smallest yet most “powerful” muscles that extends, rotates and gives support to the spine.

External Obliques – Located on the side and front of the abdomen. They flex the trunk forward, support and contain the abdominal contents, assist the breathing mechanism (particularly exhale) and tilt the pelvis.

Internal Obliques – Located under the external obliques, running in the opposite direction. They support the abdominal contents, rotate and flex the spine and play a role in breathing.

Transverse Abdominis (TVA) – Located under the internal obliques, it is the deepest of the abdominal muscles (muscles of your waist) and wraps around your spine for protection and stability.

Hip Flexors – Located in front of the pelvis and upper thigh. They’re several muscles that work together to bring the legs and trunk together allowing you to lift your knees and bend at the waist.

Gluteus medius and minimus – Located at the side of the hip. They function together to pull the thigh away from midline, or “abduct” the thigh.

Gluteus maximus, (hamstring group) – Located in the back of the hip and upper thigh leg. It’s the broad, thick, outermost muscle of the buttocks, involved in the rotation and extension of the thigh.

Hip adductors – Located deep in the inner groin and along the inner thigh. These muscles adduct the hip (pull the thighs together).

Why core strength is considered so important?

Millions of people who share in our modern culture spend a large portion of their day sitting in a work station, in front of a computer screen or just watching TV. Sitting much of the day puts a lot of strain on your lower back and since that’s the part of your body that’s supporting the majority of your weight you need core strength to remain physically functional. When you have a strong core, it protects your body from the harm of remaining seated or inactive most of the day. Sufficient core strength enables you move with more grace, balance and intention, regardless of whether you’re simply walking along, or ascending a flight of stairs.

Why is core strength important during yoga practice?

A strong core works to stabilize your entire body during yoga practice and also outside of the studio, in your regular day to day life. When you neglect to work on maintaining a strengthened core, you increase risk of injury, especially in the lower back. Think specifically about Utkatasana (the Chair Pose). It’s easy to settle into this asana with your “glutes” shifting back, and your stomach area relaxed. After all, there are a lot of things to consider while in this pose (drawing your weight back into your heels, relaxing your shoulders, melting your hips a bit deeper); but think about what happens the moment you suck your belly button in toward your spine, and how this permits your pelvis to become level, which in turn lengthens your lower spine. It even takes just a bit of weight off of your legs and all of a sudden you notice your posture improves in the pose. That’s only one example out of many, so it’s very easy to imagine the impact that a strong core has on every single asana practiced in a power yoga sequence. For instance, a strong core adds grace and stability during the simple transitions from Warrior 2, to extended side angle, and back to reverse Warrior. And that’s nothing when compared to the amount of core strength needed for arm balances and inversions like crow pose, headstand or forearm stand; all asanas that would be virtually impossible without engaging the core!

The next time you’re in a yoga class (or even when practicing at home), think about your core strength during each asana, and each transition, and watch how it transforms your overall experience. And then, continue to think about your core strength after you leave the studio and continue with your daily routine. There’s a good chance this will help you discover more purpose with every movement, even the most simple.

Attention – It Can Prevent Injury During Yoga Practice

Think about it, practically every yoga injury that happens has been the result of one or more of these three factors…

 1. Being in a hurry and moving too fast.

 2. Not paying proper attention.

3. Paying attention and knowing you shouldn’t do something, but doing it anyway.

One of the best ways to tweek your asana practice is to consider it your body’s way of getting your attention and maintaining that frame of mind throughout the whole session.

Some Tips to Prevent Yoga Injury…

Use common sense during practice. Move slowly, paying attention and asking for help when you feel you need it. A good instructor can modify poses.

Know your body, don’t just listen to it. Remain aware of any troubled spots and avoid irritating or overly stressing them.

The instructor is not tyrant. If you feel pain or serious discomfort stop; you don’t have to do everything exactly as the teacher says.

Practice at your own pace and resist the temptation to try to keep up with the person on the mat next to you. Some postures that you are unfamiliar with may require more time and patience, so know your limits.

Yoga is all about technique. Just like it’s necessary to learn proper technique before starting a weight-training program, you need to observe proper alignment to avoid injury during asana practice.

Pay attention to the breath, and if your instructor doesn’t integrate breath work into the class, find another instructor.

  Pain and extreme discomfort are never good, if it arises, stop, don’t push into it or just get out of the pose.

Asana practice can be a mirror for the rest of your life. By paying proper attention you can easily see that most of the life events where you might have the feeling of wanting to back up and try it again are also a result of the above three situations.

Lastly, remember that yoga shouldn’t hurt. With proper attention and awareness you’ll be able to recognize those times when you may be overzealous or inclined to disregard cautions you ordinarily would take. Watch for and listen to both the subtle and not so subtle cues your body gives you about how deeply, how forcefully or how long you should hold a yoga pose. This teaches you to easily direct your attention inward which is one of the main goals of yoga.

The Importance of Attitude & Yoga Practice

Attitude applies to the way we express or “carry” ourselves. How interesting that it is derived from the Latin word for ‘fit’, and from the French word “attitudine” which means “position” or “posture”. How ‘fitting’ this word is for Yoga practice, because in yoga (as in life), much of a person’s attitude is carried in their posture.

A good teacher can easily encourage students to adapt a positive attitude. From a Yoga perspective, proper attitude is established by observing the yamas (the do-nots) and the niyamas (the dos) from Patanjali’s Yoga Sutras’ “Eight-Fold Path”. These observances lead students towards a non-harming, non-grasping, focused Yoga practice and harmonious lifestyle. One of the main things that yoga students need to be reminded of is that a posture (asana) is not about perfect results but about total effort. Remaining in touch with your body while putting in the right amount of effort so that each asana challenges you, while at the same time, respects your needs and avoids the risk of injury is the key attitude to developing a balanced practice.

Equally importantly in a Yoga class is the teacher’s attitude, because this sets the tone and the pace for the entire session.  When teachers realize that the way they carry themselves is the first thing students will notice as they come into the studio, then their body language can be a simple yet powerful tool that will create an atmosphere of trust and confidence for their students.

A teacher’s attitude is mostly a reflection of their history and personal approach to Yoga; is their attitude serious or playful, strict or accommodating, or is it somewhere in between? Quite possibly, the most important thing for a teacher to consider is whether or not they are acting according to the basic principles of Yoga. Beware of teachers that are teaching from their ego; ask yourself, are they seeking acclaim or admiration from their students? The best, most effective and respected teachers instruct in a way that knowledge can be channeled through you, without insisting you imitate them.

The Importance of Attitude & Yoga PracticeDevelop “Yogatude”, a yoga attitude…

One of the most important factors in your practice of yoga is not about your physical alignment but your mental alignment…your “yogatude”. A well aligned yogatude demands a high degree of acceptance and humility. These are traits that can be difficult to cultivate in the social setting of a class. For many students it’s easy to be hard on themselves if they’re the only one who can’t do a pose properly, or to beat themselves up if they’re the one needing the most props to do it. It’s also easy to be tempted into indulging feelings of superiority when you’re able to go deeper into a pose than anyone else.

A useful approach is to be nonjudgmental about yourself and/or others and to nurture one of the best attitudes you can possibly cultivate: a “beginner’s mind.” Engage every pose as if it were for your first time, exploring new ways to stand, breathe, and move about. Adapting a beginner’s attitude is an awesome way to “connect” with any asana and keep your yoga practice fresh and exciting, regardless of how many times you have done the same pose.

Final thought… “Suppose somebody looks at you and says, ‘Hey, how come you seem to be super happy today?’ What does that person see? Does the person see your mind? How does he or she know that you are happy? It shows in your body. That means the happiness of the mind immediately is reflected in the body. That is the proof. The same way, if you are unhappy you may be asked, ‘What’s wrong with you? You don’t seem to be happy today.’ So that means every mood immediately gets reflected in the body. Every thought has a say over every molecule of the body. Even though we see the change more visibly in the face, that doesn’t mean other parts of the body are not changed. From head to foot you change. There’s no doubt about it. That is the power of mind.” ~Sri Swami Satchidananda

The Importance of Balance in Yoga

Many beginning student/practitioners of yoga find it hard to maintain balance while practicing. Yoga asana is especially good for challenging our balance because we must hold poses still while supporting our own body weight. This forces us to use all the body’s available balancing mechanisms to stay upright and steady.

The technical name for our sense of balance is called “Equilibrioception” and it involves five components or processes, making it more complicated than most people imagine. We all seem to take it for granted. Consider the following summary of the numerous body functions and mechanisms that must work in harmony for us to keep our balance:

  • 1. Your Inner Ear – The inner ear is part of your body’s and is also known as the vestibular system. Movement of fluid in the inner ear tells the brain where the head is located in relation to the rest of the body. It also communicates the speed of movement related to the head – e.g.; when our head is moving up and down or left to right.
  • 2. Your Eyesight – The body uses vision as an anchor for determining where you are in relation to the rest of the world. Through our eyes’ visual recognition we are able to sense where we are in relation to other objects, plus whether or not we are moving, and if so, how fast.
  • 3. Your Central Nervous System (CNS) – The Central Nervous System consists of the spinal cord and the brain. It connects all areas of the body to the brain via a system of nerves. The central nervous system is responsible for almost everything we do; from something as simple as breathing to something complex, like solving a math problem. This system can be thought of as the “command center” of the body because all movement and systems are regulated via the CNS. The CNS is then connected to the rest of the body including muscles, organs and glands. In order for balance to be maintained, a healthy and functioning CNS is imperative.
  • 4. Your Breath & Breathing – In order for the body to stay balanced it must “centered” and have attained to certain level of relaxation. Deep breathing and relaxed diaphragm muscles will help the body relax, become more centered and that helps maintain balance.
  • 5. Your Muscles – In order to establish and maintain balance your muscles must be strong enough to support our body weight. It is also important that the body does not favor or use one set of muscles over another set. For example, if the lower back muscles are stronger than the abdominal muscles, one may have a tendency to lean back more than necessary while standing. This can negatively affect both posture and balance.

4 Helpful Tips for Improving Balance While Practicing Yoga…

  • 1. Remain in Conscious Control of Your Breathing – As I mentioned above, one of the easiest, quickest ways to lose your balance is by tensing up your body and taking short, shallow breaths. While holding a pose be sure to keep the breathing long, light and steady plus keep the body relaxed, especially the diaphragm region.
  • 2. Focus Your Eyes On a Point – Before attempting to assume a balancing asana, find a stationary spot in the room to fix your eyes to. For example, a poster on a wall, a knob on a door or a cup on the floor. Whatever it is, fix your eyes there and steady yourself first before entering fully into the pose. As you slowly raise your body into the pose, keep staring at that same point. This orients your body giving it a visual anchor, which greatly improves balance while practicing.
  • 3. Concentrate on the Area Demanding the Most Strength – Whenever anyone comes into a pose requiring balance, there will likely be one specific area of the body’s musculature that is most taxed in order to maintain an upright stance. Using the tree pose for example, the area most taxed will be the ankle and leg of the standing foot. While remaining in this pose, focus your attention to the ankle and leg. Feel each tiny muscle, nerve and reflex working constantly to keep you upright and balanced. Feel all the minute adjustments that must be made every millisecond you remain in thi pose. Keep your mind focused on this area but relax (see #4)…
  • 4. Don’t Try To Hard – This may sound counter-productive, especially if you are focusing your attention to the area most taxed. Nonetheless, the fastest way to topple or fall is by trying too hard to stay upright. The key here is to relax and to trust your body. Your practice will show you what you need to do to stay balanced in the pose. Trust in the process.

3 Easy Yoga Poses to Help With Improving Balance…

  • The Importance of Balance in Yoga

    Tree Pose

    1. Tree Pose (Vrksasana) – If you are not able to bring your leg all the way up, try resting the bottom of the foot against the inside of the standing leg. You can either place the foot by the shin, or up higher where the leg meets the body. Do not place the foot on the side of the knee.

    The Importance of Balance in Yoga

    Side Plank

  • 2. Modified Side Plank (Vasisthasana) – If this pose needs to be modified, you can bring the bottom knee down to rest the leg on the floor. Bend the knee of the bottom leg and bring the foot behind the body at a 90 degree angle.
  • 3. Eagle Pose (Garudasana) – To modify, do not wrap the lifted foot around the standing leg. If the shoulder stretch is too deep, you may cross the wrists over each other and place the hands in such a way that the back of the hands touch each other.


A strong sense of balance promotes stillness in yoga poses, as well as stillness in your mind. As your balance improves you’ll also notice the strengthening of your your muscles and improved flexibility and overall muscular control, as well as a greater body awareness. Once the mat’s rolled up and you leave your studio you’ll notice increased balance and improved posture, making simple tasks (like walking in heels). Practice these balancing poses and you’ll feel more balanced physically as well as mentally.

The Anti-Aging Benefits of Yoga

Anyone who has been practicing yoga for a time will agree; there’s a strong connection between your body and your mind. So, whenever your mind is under stress, your body reflects it in numerous ways; poor posture, low back pain and tense muscles, are just a few examples. It should then be no surprise, that people who are under a undue amounts of stress seem to age faster than those who have learned to manage it properly. Stress, along with gravity, of course, is what makes us age.

There are some basic attributes that characterize someone who’s vibrant and healthy; someone who appears to:

  • ■ Supple, radiant skin.
  • ■ Strong, lustrous, shiny healthy hair.
  • ■ Well defined muscles.
  • ■ Good posture and bone structure.
  • ■ Boundless energy.
  • ■ A light but firm and confident gait.
  • ■ A balanced attitude toward self, life and others
  • ■ A calm and peaceful demeanor

Believe it or not, you too can feel this way, and it has nothing to do with how old you are. Although not exactly magic or Ponce de Leon’s famed fountain of youth, yoga is a great age-defying stress reducer. If you practice yoga on a regular basis, you just may start to notice some awesome and welcome benefits. To begin your own personal anti-aging campaign, try practicing the following a few times per week:

*Keep Your Spine Flexible

Think of your spine like the foundational frame of a house that holds everything together. If that frame becomes dysfunctional, all sorts of problems will begin to manifest themselves.  A healthy spine assures your body maintains its structure, supports your head, your arms and legs, and provides a shock absorption system for all of your activities. In addition, it houses your central nervous system (spinal cord), the superhighway that connects your brain to the rest of your body. Considering all of the work it does, it’s no wonder your spine often gets tired on a daily basis. Even those who seem to have the best posture may find themselves slouching a bit at the end of a particularly stressful day. Become familiar with basic spinal anatomy, structure and function and that will help empower you to take control of your health. Give your spine some loving attention with asanas (yoga poses) that elongate, strengthen and stretch your spine and counteract any bad postural habits too. Alternating cat and cow pose is a great start. A spine that’s flexible will promote good balance and strength which will affect your overall health in a positive way, putting that youthful bounce back in your step.

*Relax and Release Your Muscle Tension

Common bodily aches and pains are often the result of tight or stressed muscles. Ranging from headaches to back problems and incorrect alignment, tight muscles can slowly leave you slouched or hunched over and limit your ability to perform activities that you love or need to do. Given enough time, range of motion will diminish and many of the daily activities you once performed with ease can become quite challenging. The three poses of Yoga for complete relaxation are Dradhasana (firm pose), Shavasana (corpse pose) and Adhvasana (relaxation pose).

Self-massage is another method you can use to improve circulation and warm up your muscles, this may encouraging them to release toxins that that may be at the root of your aches and pains. A general rule of thumb is to use light circular motion over joints and areas of pain and sweep with long strokes over areas such as the front of the thigh and arms always massaging towards the heart. Self-massage is especially useful to help you relax during the day, either at work or at home; even if you can only afford to spend a couple of minutes massaging your neck and shoulders. Your morning shower is a great time for self-massage because your skin and senses come alive in the steam of the warm water and self-massage relaxes your muscles, getting you ready to tackle the stresses of the day ahead.

*Breathe in Life’s Energy (Prana)

Breathing correctly oxygenates your body through your bloodstream, nourishing every single cell in your body. Breathing also functions as a purifier to help you cleanse your body of toxins acquired throughout the day. The breath (as prana) is life. Pranayama is both the extension and the control of breath, and indeed the most subtle energy of the body. Although there are many different schools and techniques for learning pranayama, the most basic approach is simple awareness of the breath. You will find that lying or sitting in a comfortable position and just watching your breath for a set period of time will reap powerful benefits. You’ll become more focused and relaxed. You can simply notice your breath dispassionately and without judgment or you can focus your breath on a particular area of your body and with each inhale you send the breath to that spot, extending love and compassion to that area that’s been “aching” for attention. With each exhale, you release, allowing the tension and pain to leave your body with each breath. Pranayama is a gift you give to yourself and it too keeps on giving.

*Meditate, Meditate And Meditate!

The Anti-Aging Benefits of YogaIf you’re looking for inner calm and a peaceful, more positive outlook on life, take a minute (or two – or ten) to bring your body, mind and senses into balance. Once you achieve this balance through meditation, your nervous system will find its sense of equilibrium and calm down, you’ll be less anxious and more open to gaining some powerful insights into your true nature (which is ageless). There are plenty of ways to meditate, so don’t be afraid to try, just find what works best for you and stick with it for a while. The process itself will show you the way. If you’re a beginner, just focus on your breath with no critique or judgment, and notice how it flows in and out of your lungs. If your mind begins to wander away from your breath, gently bring it back, remembering that the breath is the beginning and end of all life.
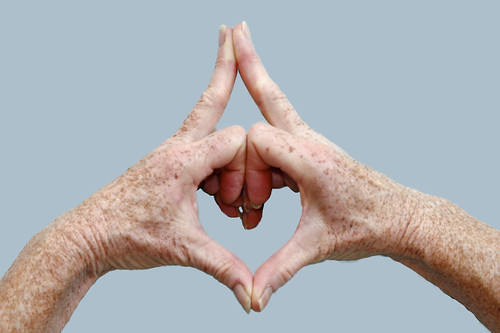
Conclusion: Yoga is rapidly catching on as one of the most efficient and effective forms of exercise for older people. Even when it’s compared to other Eastern forms of exercise, yoga is still regarded as the best by many who have practiced a variety of disciplines. Since antiquity many yogis have lived well into their nineties with full retention of all their functions and faculties and have even managed to astound the world over with their physical prowess, even at such an advanced age.

The Anti-Aging Benefits of Yoga

Addressing Common Yoga Injuries (Pt. 2 of 2)

This article is a continuation of Addressing Common Yoga Injuries (Pt. 1 of 2)

Turn those Ouches into Oms – Some practical suggestions for safe yoga practice.

Proper alignment when doing asanas (poses) is key to preventing injuries, but it’s not the only factor in a safe yoga practice. To minimize concerns over injury, follow the basic recommended guidelines below.

  • 1. Leave your ego at the door. It’s often tempting to push yourself into more advanced poses (after all, how tough can a handstand be, right?), but rushing our bodies before they’re ready greatly increases our risk for injury. Yoga is about finding out where you are at, not trying to push yourself to in order to appear better than you really are. Yoga class is not a competition.
  • 2. Always take time to warm up. This is an important part of any physical activity, sport or exercise program, and yoga is no exception. Basic, simple stretches (like neck and shoulder rolls and gentle spinal twists) help prepare the muscles, joints and connective tissue for more challenging poses later on in a sequence when actual practice begins. Remember, your mind needs to warm up too; take a few slow, deep breaths to get centered at the beginning of class, it’s also good to chant some Oms to get yourself grounded.
  • 3. Ease in slowly. No one should expect to finish a marathon the first time they put on a pair of running shoes. Don’t expect to do a perfect headstand or even get your heels all the way down to the floor in the downward dog pose the first time you attend a class. Instead, opt for beginner-friendly classes or a qualified teacher who will help you develop the foundational skills for more advanced postures and moves.
  • 4. Communicate Honestly. Don’t just get to know your teacher, let them get to know you also. Be sure to share any pre-existing conditions or issues that might require modifications in certain asanas. A qualified instructor will be glad to show you how to modify poses or use props, so never be afraid to ask.
  • 5. Come out of static postures slowly. This is particularly important if you’ve been holding a certain pose for several minutes. A good rule of thumb is to work your way out of a pose as gradually and slowly as you moved into it.
  • 6. Use the props and modifications recommended by your teacher. There’s no shame in not being able to hold a pose or move all the way into it completely onyour own. Whenever there’s tightness anywhere in the body, other parts of the body will have to adjust to accommodate it. This is why it’s so important not to push the body past what it’s able to do in any given pose.  Props and modifications allow the body to get a feel for a pose without being able to get fully into it and this will help you to gradually work up to its full extension or variation without undue risk of injury.
  • 7. Don’t ever lock your joints. Hyper-extension (joint-locking) is probably the fastest way to wear out joints and cause injury or problems down the road. Focus instead on engaging the muscles, tendons and connective tissue around the joints, this helps you to gain stability.
  • 8. If you feel you’re hurt or injured, Stop. If you think you’ve tweaked, pulled, or torn something during a yoga session, tell your teacher immediately and, if need be, don’t be afraid to leave the class early. Care for it like any other sports injury, and seek the advice of a trusted health care professional if the pain or condition persists.
  • 9. Stay for savasana (corpse pose). Students are sometimes tempted to head for the door as soon as the instructor calls for savasana (the final resting pose usually at the end of a yoga session), remember it’s not only good for your health, it’s necessary for your composure. Savasana allows the body’s nervous system to slow down and readjust, bringing closure to the practice. Just two or three minutes in this asana can have a beneficial effect.
  • 10.Listen to your body. This may be the most important tip of all for avoiding injury. At all stages (or levels) of yoga practice, remain mindful. By really listening to your body you can be sensitive to any tightness, stress or strain. Simply because you did a particular pose with ease one day, doesn’t mean your body will automatically be able to do it the next. Build your relationship with your body just like you would with other people, by listening and being attentive.

Always remain mindful of your body, respect yourself and where you’re at on each and every day. Your body changes quite often and your yoga practice should accommodate those changes, adjusting itself accordingly.

Closing Notes:

Make sure you do your homework before joining a class or choosing a teacher. As yoga’s popularity continues to grow, more and more students are flocking to classes, increasing the need for skilled yoga instructors. Inexperienced or poorly trained yoga teachers often unintentionally cause harm or injury by teaching above their own training and/or ability levels. Well-trained certified instructors have a thorough knowledge of anatomy, human movement and the physiology of exercise. A basic understanding of the ideology, philosophy and history of yoga is essential. Teachers who focus on specialties such as seniors, kids, yoga therapy or pre-natal yoga, requires that they have additional training above the foundational level.

Addressing Common Yoga Injuries (Pt. 1 of 2)

Well over 20 million people are currently downward-dogging it across the entire U.S. in an attempt to gain the many health benefits associated with yoga. To name a few of these benefits from yoga practice:

  • *Increased strength
  • *Improved flexibility.
  • *Reduced tension, anxiety, and stress.
  • *Lower blood pressure

Scientific studies have also shown that yoga can improve respiration, heart rate, and metabolism plus it helps reduce pain. In spite of all the benefits this doesn’t mean that yoga, if and when performed incorrectly, can’t also cause injury or harm.

Addressing Common Yoga Injuries (Pt. 1 of 2)

Although most injuries resulting from yoga practice aren’t severe and often go unreported, more serious issues can and do occur occasionally. This includes strains and sprains, fractures, dislocations, and, in rare cases, bone spurs, sciatic nerve problems, and even stroke. But according to yoga trainers, fitness instructors, personal trainers and other  experts, injuries can happen at any time, in any sport or exercise regime, even walking down the sidewalk, although debilitating and life threatening injuries are extremely rare.

With yoga practice, most common injuries develop gradually over years, and are generally a result of consistent over-stretching and/or misalignment. When engaging any physical activity, the safest approach to stay in touch with your body to avoid overdoing it. And with yoga, proper guidance and instruction is necessary to learn how to practice the asanas (poses) correctly and safely.

Areas of most concern when practicing yoga asana…

Wrists: Leverage is all important when it comes to the wrists. Don’t place all of the body’s weight on the wrists when the hands are on the mat as that can lead to both muscle and joint injuries. When practicing any asana where weight is placed on the hands (e.g.; downward dog, cat/cow), distribute the body’s weight through both your hands by spreading them so that they are in line with the shoulders and then press through the fingers. In downward dog (Adho Mukha Svanasana), push the hips back to decrease the angle of the wrists to the floor slightly. In arm balances, such as crow pose (Kakasana), check to make sure your elbows are stacked directly over the wrists.

Elbows: Joint pain in the elbows can result from bending them out to the sides in asanas like the four limbed staff pose (Chaturanga). Because it’s easier to execute some students tend to lower themselves down with outward-pointing elbowsand this will stress the joint (plus it puts undue stresses on the wrists). When bending the elbows in asana (especially plank or Chaturanga), keep the elbows tucked in alongside the ribs as you bend them, and make sure the elbows’ creases remain  facing forward.

Shoulders: Resist the temptation to shrug. By raising the shoulders up toward the ears (e.g; moving into upward dog), you’ll stop using the supporting muscles in your arms, shoulders, and neck. Shrugging also compresses the shoulders, which can also cause muscle injuries. Beware of over-extending or over-stretching it’s relatively easy to injure the shoulder girdle or rotator cuff (even dislocate the joint). Focus on keeping the shoulders held back and down away from the ears.

Ribs: Twists work great for releasing tension, but if done improperly they can easily be overextended and bruise the intercostals (the muscles in between the ribs). Lengthen your torso upwards through the spine before and during twisting. Imagine a cord attached to the crown of your head that is gently pulling you up toward the celestial space. No matter how flexible you feel you are, twist only to the point of feeling the stretch but not beyond it.

Lower back: Lower back pain is the most frequently reported yoga injury, and most certified teachers suspect that it’s the result of “rounding through the spine” in poses like forward folds and downward dog. This unnatural rounding causes the spine to bend the opposite way that it’s meant to, which can lead disc problems. This can also be the cause of that achy feeling post-session. Before engaging any bending poses, imagine lengthening your spine up and away from the hips, this will help to avoid rounding. If your hamstrings are too tight, try bending the knees slightly in poses like forward folds and downward dog.

Hamstrings: As a result of spending too much time sitting in front of the computer, in class, or driving a car, many of us have tight hamstrings, so it’s easy to pull or over-stretch them in poses like forward bends. Downward dog and lunges are great ways to stretch the hamstrings (just remember to go slowly, work at your own pace and don’t overdo it). If you have any kind of hamstring injury, temporarily lay off poses that extend through the back of the body and legs until the injury heals.

Hips: When practicing warrior poses, splits and wide-legged forward folds it’s easy to over-extend the hips’ range of motion in, which in some cases might even tear the muscles of the inner groin or inner thighs. Proper form insures that the toes are pointed forward when attempting any pose where the hips are squared off in the same direction (envision warrior I).

Knees: Knee problems can plague both students and even experienced yogis well after the session is over. The most common causes of knee pain are the cross-legged positions (Padmasana and Sukhasana, Flexibility needs to begin with the hips first; if the hips are tight in asana, the knees will be the first to feel pain or tension. Placing a yoga block or rolled-up blanket under the knees in cross-legged positions generally helps to reduce strain.

Neck: Head stands (Sirsasana) and shoulder stands (Sarvangasana) can be the worst culprits for neck pain or injury. Repeatedly and/or incorrectly placing pressure on the neck in poses such as shoulder stand and headstand can compress the neck and put undue pressure on the cervical vertebrae, resulting in joint issues and a loss of neck flexion in some cases. It would be best to avoid full inversions altogether if you have chronic neck or shoulder issues. It is very important to remember not to jerk the head once you’re up in the pose, because it can destabilize the body and cause a fall.

*Stay tuned for part 2 where some practical guidelines to avoid injury will be discussed.

Asana – Protect Your Joints with Proper Alignment

One of the most important responsibilities of a yoga teacher is to help their students get back in touch with their bodies. As we grow older, most of us gradually “grow out” of our bodies, often decreasing our ability to understand how our bodies really function, and then we tend to miss or ignore the built-in signs and/or warnings that can alert us to any current or potential future problems with our joints and connective tissue. By re-learning (or even learning for the first time) about the basic structures and functions of your body, with the help of your yoga instructor, your practice becomes a great starting point for getting back in tune, avoiding complications or problems.

Learning how to protect and care for your joints, tendons and connective tissues (knees, elbows, hips, etc.) during yoga, – is one of the most important step to help ensure you have a lifetime of safe and rewarding asana practices.

Your feet are the foundation…

When practicing yoga, start with your foundation, your base (the feet), and then build from there. If the feet aren’t properly aligned, then it’s likely that the rest of the body, starting with the knees is also misaligned.

A good place to start is by looking at your body in Tadasana (Standing or Mountain Pose). When you stand in Tadasana, look down at your feet. Some of us stand with our toes pointed out (outtoeing), or our toes pointed in (intoeing or “pigeon toed”). In yoga, it’s important that your feet to are parallel.

Next, notice how your weight is distributed on your feet. Do you tend to put more weight on the balls of your feet or do you tend to lean back with more weight on your heels? Check a pair of shoes that you’ve worn for a few years, you’ll get a good idea where you place most of your weight on your feet.

During yoga practice, you are encouraged to distribute your weight onto the “four corners of your feet;” this includes the inner and outer heel, and the ball (both the big toe and the pinky toe side of the feet). It is good for students to practice lifting their toes, spreading them out and then lower each toe, one by one, back down to the floor or the mat.

Now take a quick look at your knees. It’s common for students to lock their knees when they come up into Tadasana or the half-lift from forward fold and quite often they don’t realize it’s happening. Locking or hyper-extending the knees are hard on them and will tend to cause pronation or supination in the feet (see illustration above). Be aware of that habit and correct it by micro-bending the knees.

The Warrior Poses

Asana - Protect Your Joints with Proper Alignment

Warrior I

The Warrior poses are an awesome way to help you learn the basics of protecting your knees throughout your yoga practice. Starting with Warrior I and II, it is necessary for you to watch the alignment of your feet, the distribution of your weight on your feet, as well as well as the alignment of your knees. You also want to make sure you stand tall in the torso, drawing the belly/core up and in for support; avoiding leaning the torso forward.

Make sure you check the position of your feet. For example, while in Warrior II, look at your feet. Your front heel and back heel should align or your front heel may line up with the arch of the back foot. As far as the set distance between your feet, find what is most comfortable but make sure that your front (bent) knee stays above or slightly behind the front ankle.  Essentially your feet should end up below your wrists.

Asana - Protect Your Joints with Proper Alignment

Warrior II

Next, press into the big toe and pinky toe sides of the front foot, as well as into the outer edge of the back foot as you simultaneously lift up through the arches of both feet. At this point it’s important to engage the inner thigh muscle (the vastus medialis) of your front leg along with the other quadriceps muscles so that you properly align the knee. Pressing down into the big toe as you lift up through the arch of the front foot helps engage these muscles.

Keep a close check on your knees to ensure that your front knee always stays above or slightly behind the front ankle. If the knee drifts or creeps forward in front of the ankle, this will generally cause strain to the area.

You can protect your knees and strengthen the vastus medialis by following three basic rules for the warrior poses.

  • 1. Make sure your knee is bent properly to a right angle, so the weight is centered in your heel. If your toes are gripping, it’s a sign that your knee is going too far beyond your heel.
  • 2. Don’t let the inner arch of your foot collapse, for this is a sign that your knee is turning inward too much. (These two actions—grounding and lifting—will keep the knee from turning inward or outward too much.)
  • 3. Make sure that the heel, kneecap, and hip joint of your bent leg are in the same plane by allowing a slight turn of the hips.

With appropriate instruction from a certified yoga teacher you will soon become aware that there are many details to learn in terms of proper alignment and form in yoga. These principles are not to make your sessions burdensome, but rather, they are there to ensure that your practice supports and strengthens your body for many years to come. So, with a “certified” yoga teacher you can rest assured that he/she fully understands anatomy, kinesiology and proper alignment, and that they are qualified to teach you and help you practice safely every time you roll out your mat!